The camera never lies, but it can – and usually does – mislead. As photographers, we can control this to a remarkable extent by making use of perspective and changing our camera position to suit the effect that we want to achieve. Perspective – how things appear to relate to each other – depends solely on the position of the camera. You can exert a considerable effect on apparent relationships simply by changing where the camera is sited.
In these days of Photoshop manipulation, many still believe that an unedited photograph truthfully records the scene. However, a completely false impression can be created just by the choice of camera position and lens.
The further away something is, the smaller it looks, and the nearer it is, the larger it looks. In the real world, we can estimate distance fairly well based on the clues supplied by our binocular vision. We also have our experience to help us; for example, we know that a person is smaller than a house, and if a photograph shows someone larger than a house in the background, we know it is just an illusion.
But what happens when we look at a two dimensional image, with objects which give little clue as to their relative sizes? Here, the camera can be used to trick us into seeing a false reality as illustrated by this photograph of Patcham windmill showing a large lake in the foreground.
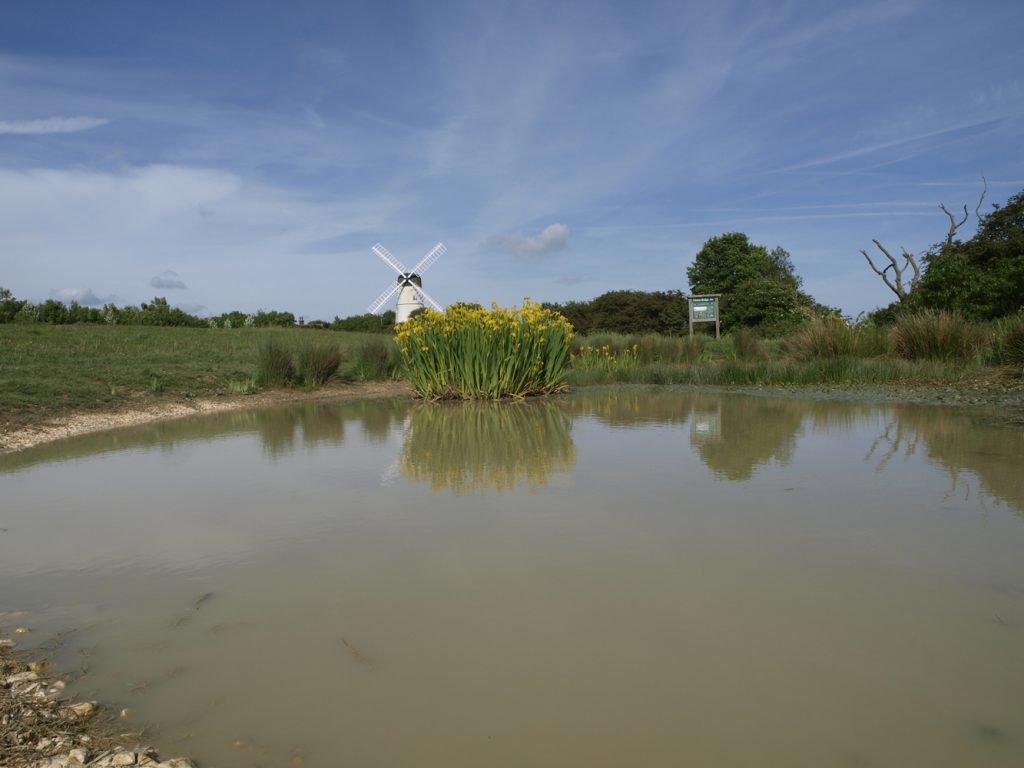
If you’ve been there, you may not have noticed the lake – with good reason: there isn’t one! It’s been “created” by the photographer. As seen when approaching, it looks like this:
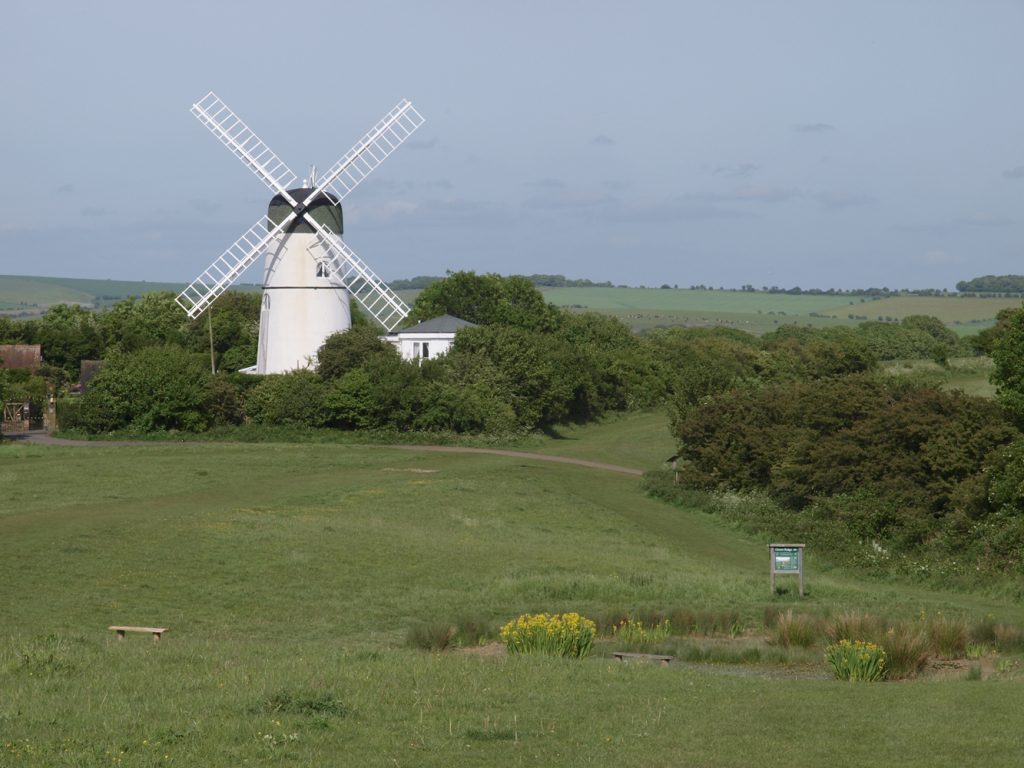
For the first photograph, I was very close indeed to the dew pond; I achieved a very low viewpoint by lying on the ground with the camera as close as possible to the water. To include the whole scene in the frame, I needed to use a wide angle lens. For the second, photographed from further away and on higher ground, I held the camera at head height and used a long focal length lens. This photograph shows the pond and windmill in something closer to their real comparative sizes.
The lesson is that the camera position has a large influence on how the subject appears in a photograph; by careful choice of position and lens, we can exert a great deal of control even when we can’t alter the subject inherently.
The above was the article as it appeared in Hove Park Living, but there are a few additional points that there weren’t room for in the magazine.
The first point – which should be obvious to all, especially now that the photographs are larger – is that in this case, the illusion falls down due to the very prominent group of flowers at the far side of the lake. I was aware of this at the time, but went ahead anyway specifically to illustrate the point about the effect of viewpoint. There is a common picture postcard view of the Brighton Royal Pavilion that uses the same principle to show a large lake (which is smaller than a child’s paddling pool in real life) in front of the Pavilion. It’s hard to spot even if you’re looking out for it!
It’s also worth taking a look at the third photograph in the series, taken from an intermediate distance.
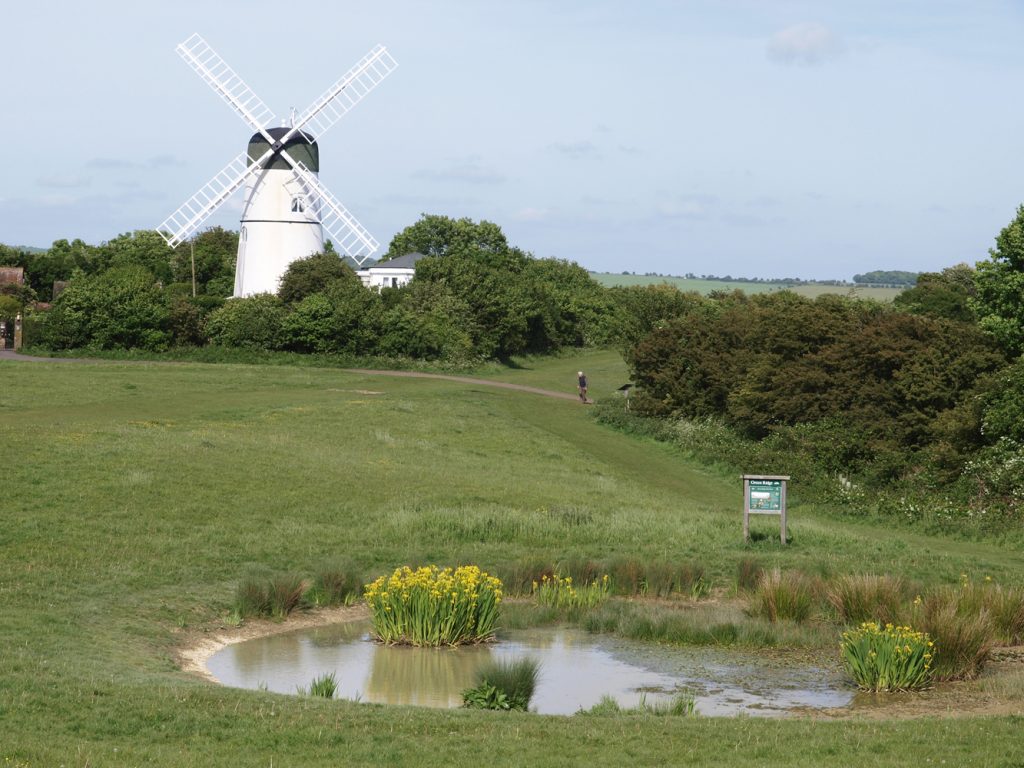
This gives the best idea of the relative scale of the pond, but also makes another point. The first photograph shows the windmill as a small item in the overall scene, and gives an impression of isolation and wide open spaces. The second has the windmill dominating the scene, and the third shows it as a component of a view, along with the pond. The relative scale of the windmill influences the mood of the photograph. A low camera position combined with a wide angle lens can be used to emphasise the foreground and create a feeling of wide open spaces.
When there are two separated objects, you can arrange the camera position to place one behind the other; and, by extension, arrange to have any horizontal separation you like. You can use this to simplify the composition or to position objects to make the most pleasing arrangement.
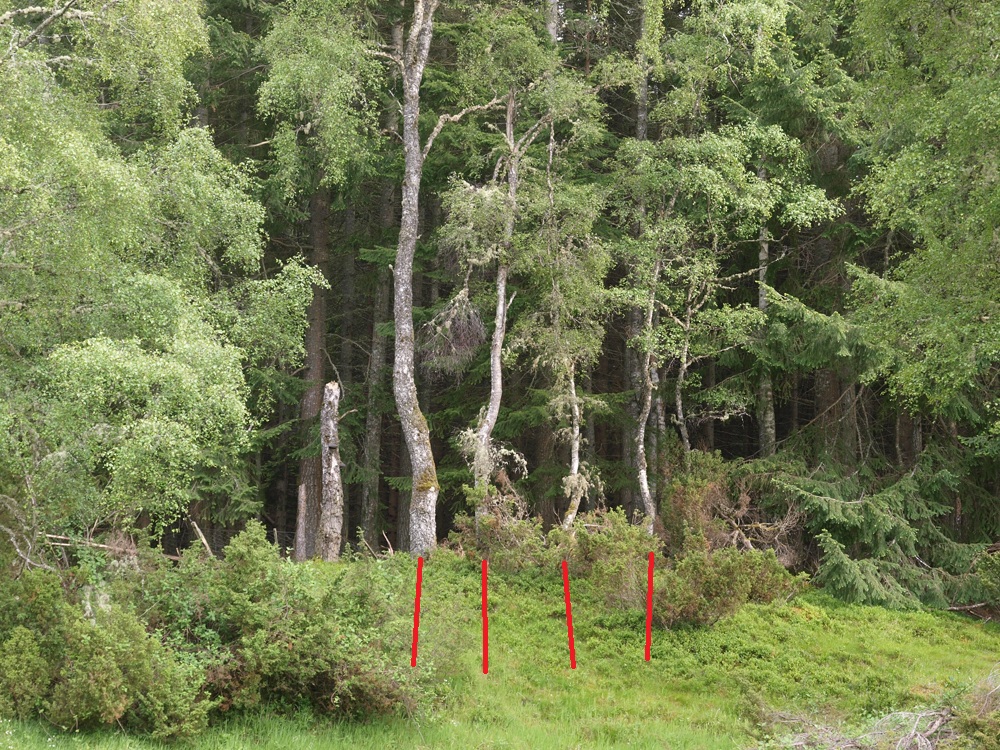
In the woodland scene above, what caught my eye was the arrangement of the four trees I’ve marked in red. However, I didn’t like the light coloured and very obvious tree stump on the left, and the confused arrangement of overlapping trunks by the side of the tree on the far right. The enlarged view of this part of the scene shows these trunks in more detail.
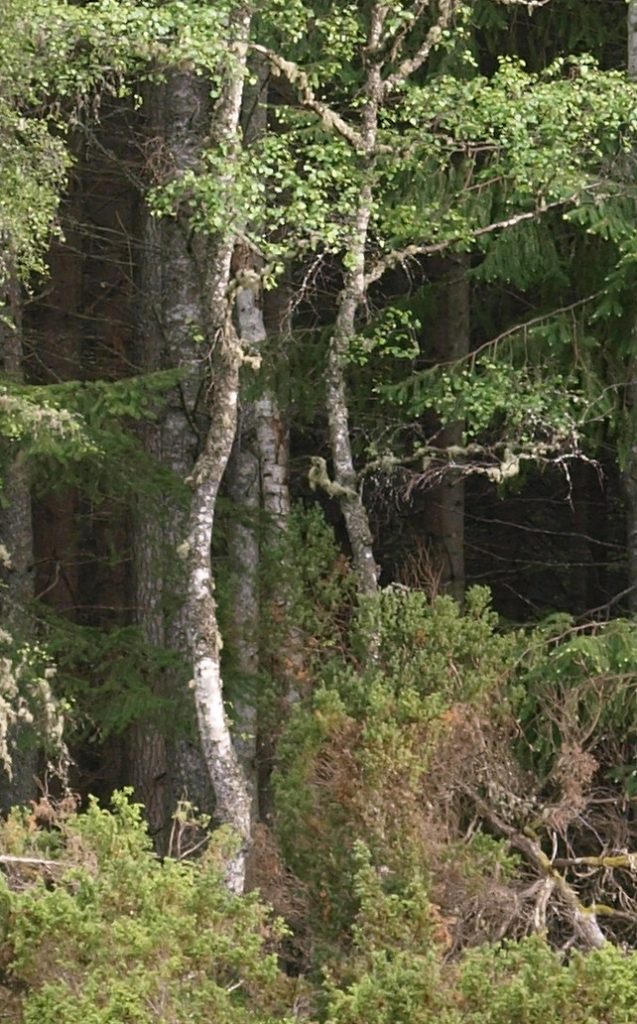
I knew that how these lined up depended on my position relative to them, so I moved different distances from side to side, observing the effect on the relationships of these objects. Looking at the mass of tree trunks on the right, just six steps produced a great simplification.
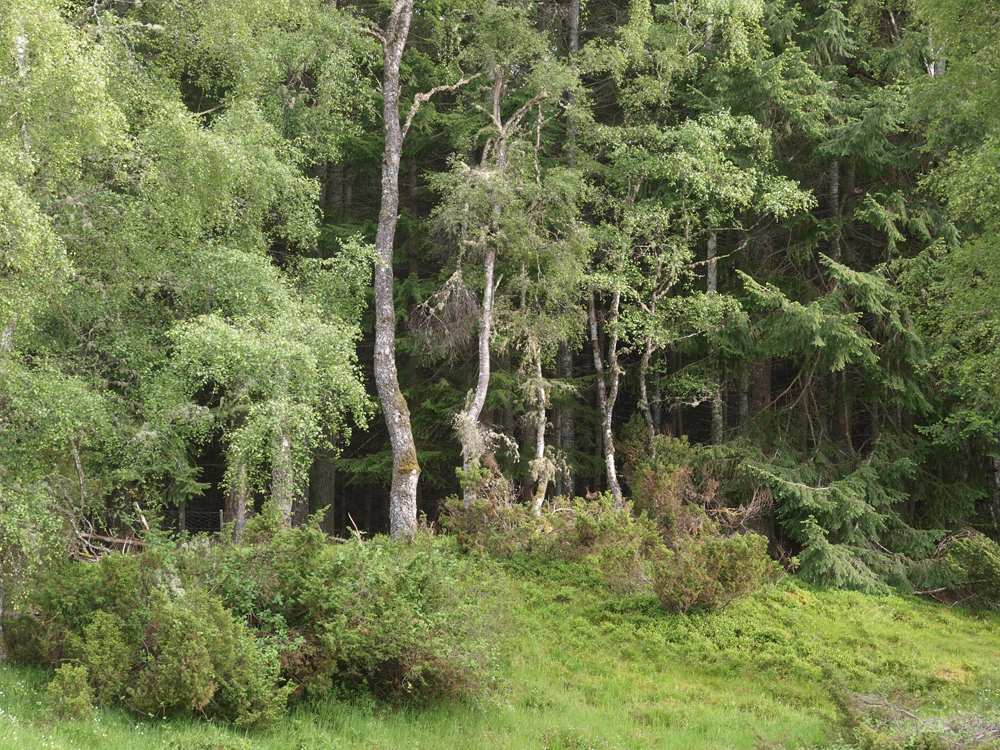
The new position has not only hidden the unwanted tree stump, but also two of the trunks, and made it appear that the third is part of the tree on the right. The resulting simplification concentrates the attention on the parts I wanted to emphasise.