There’s more to creating a black and white photograph than just removing the colours because a vast difference in colour is no guarantee that there will be a vast difference in the values of the grey that the colours convert to. As an example, here’s a photograph of red roses and green leaves alongside the result of converting to greyscale in Photoshop:
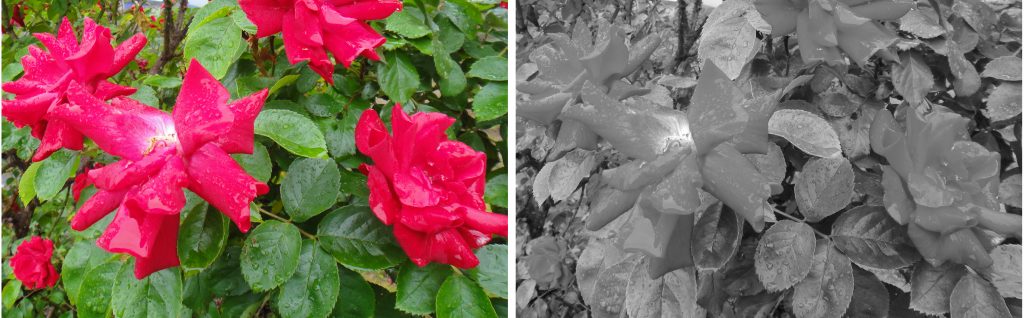
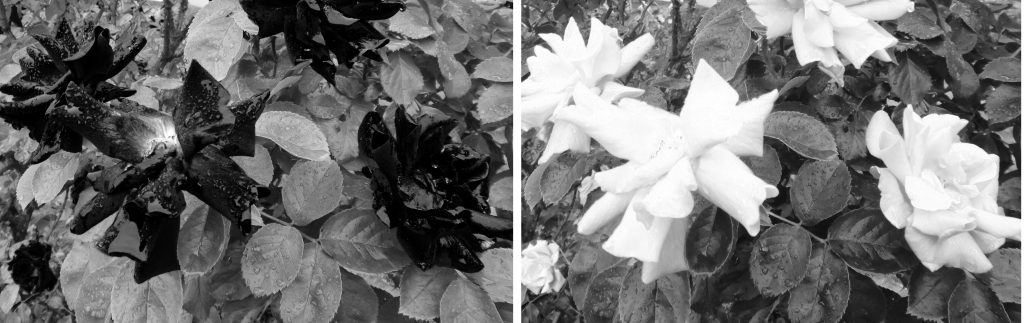
The roses no longer stand out, having become the same colour as the leaves. When using black and white film, coloured filters are used to accentuate the differences between colours. They work by lightening the colours that are the same as the filter, and darkening the complementary colours; in the example above a red filter would darken the greens and lighten the reds, and a green filter would do the reverse. Photoshop lets us do the same thing when converting to black and white. Starting from the same coloured image and using channel mixer, I produced two very different versions, darkening the roses in one, and lightening them in the other.
If you want to realise the full potential of this type of photography, you should take control over how colours translate to black and white. If starting from a digital file, a jpg file is the worst starting point because it limits the tonal range available.
If you make a selection based on colour in Photoshop, you can fine tune the result; here I was able to control the effect so as to single out a single bloom:
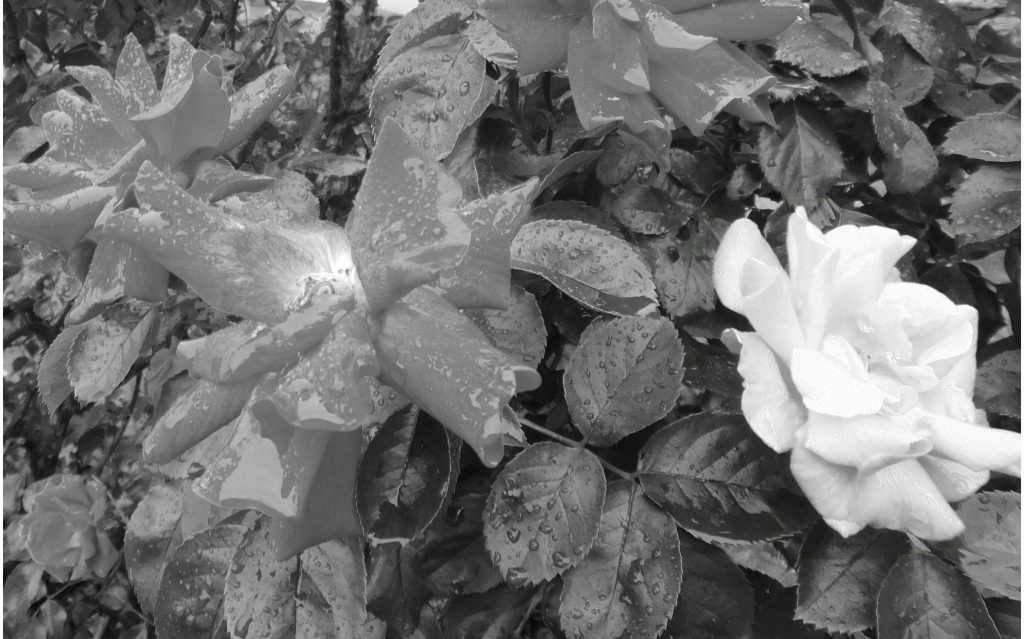
The ability to control the tones to this degree gives a lot of scope for emphasising different parts of an image.